Today we will discuss how we can enable Silent Bitlocker on Windows devices via Intune
In order to enable Bitlocker silently there are some prerequisites that we have to match;
Pre-Requisites
- If end users log in to the devices as Administrators, the device must run Windows 10 version 1803 or later.
- If end users log in to the devices as Standard Users, the device must run Windows 10 version 1809 or later.
- The device must be Azure AD Joined or Hybrid Azure AD Joined.
- The device must contain at least TPM (Trusted Platform Module) 1.2.
- The BIOS mode must be set to Native UEFI only.
- WinRE must be enabled
Once you verify the prerequisites we can go over the settings that we need to configure. Bitlocker can be configured from Endpoint security and from a Configuration profile. Today we will enable BitLocker using the Configuration profile. These are at least settings that are required to be enabled in order to activate silent BitLocker. Here are the steps to create Silent Bitlocker from Intune.
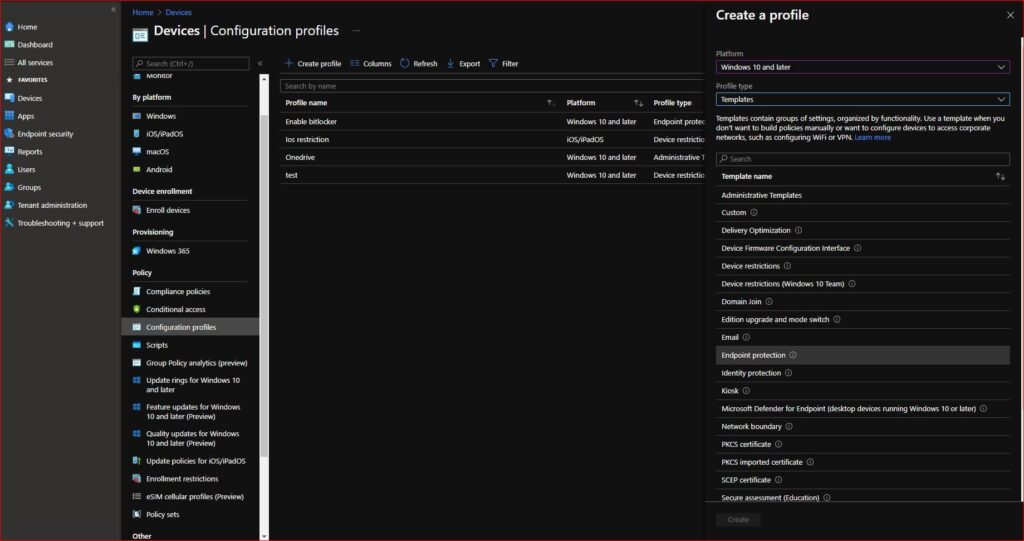
- Sign-in to Intune Portal
- Devices > Configuration Profile Windows
- On the Configuration Profiles tab click +Create profile
- Choose Windows 10 and later as Platform and select Template
- Choose Endpoint Protection as Profile type
- Click Create
- Give the configuration profile a Name
- Enter a Description (Your choice)
- Click Next
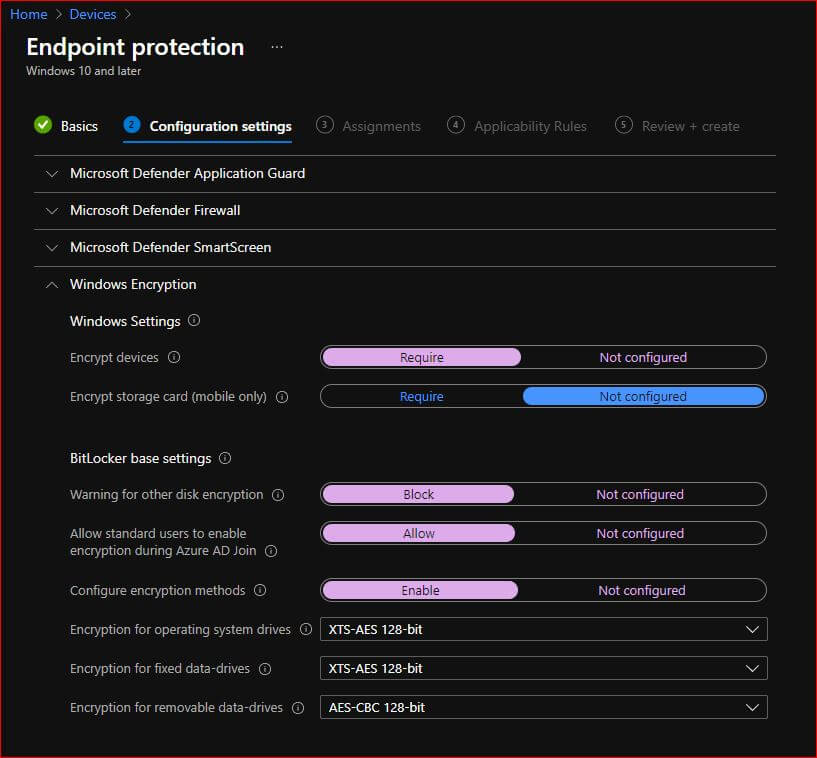
- Click on Windows Encryption
Make sure to have these settings enabled;
- Encrypt Devices – Require
- Warning for other disk encryption – Block
- Allow standard users to enable encryption during Azure AD Join – Allow
- Configure encryption methods – Enable
- Choose the algorithm you would like to implement on the remaining three options
Here are the reasons for selecting these settings;
1 Encrypt Devices – Require
This will enable BitLocker
2. Warning for other disk encryption – Block
This option blocks a warning message about checking for third party disk encryption before enabling BitLocker. This is the very first step on enabling the sielnt encryption. Once enabled user won’t get any pop-u for bitlocker.
3. Allow standard users to enable encryption during Azure AD Join – Allow
Once Popup is blocked, by allowing this option allows users account to have to bitlocker enable. Which means as pop-up is blocked user account will have accessibility to allow bitlocker to be enabled. This way it will be enabled without user interaction/ Silently.
4. Configure encryption methods – Enable
This needs to be enabled if you prefer not to use the default encryption ciphers.
NOTE: If you already have BitLocker applied on a machine and now you want to change the BitLocker algorithm you first have to decrypt the device first in order to enable this. Then,
- Compatible TPM startup- Require TPM
- Compatible TPM startup PIN- Do not allow startup PIN with TPM
- Compatible TPM startup key- Do not allow startup key with TPM
- Compatible TPM startup key and PIN- Do not allow startup key and PIN with TPM
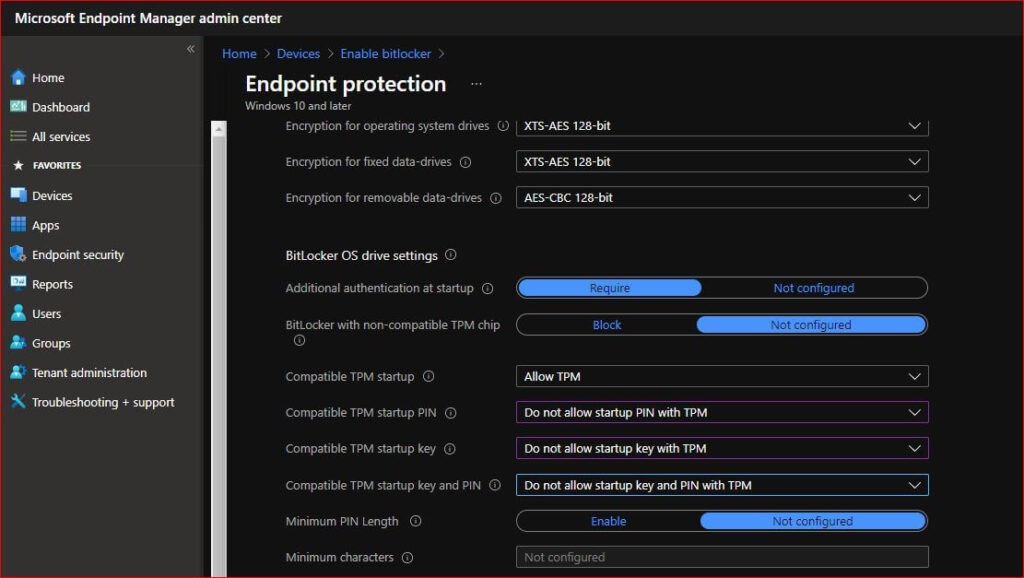
These settings are inter-related and you can find detailed information in this link.
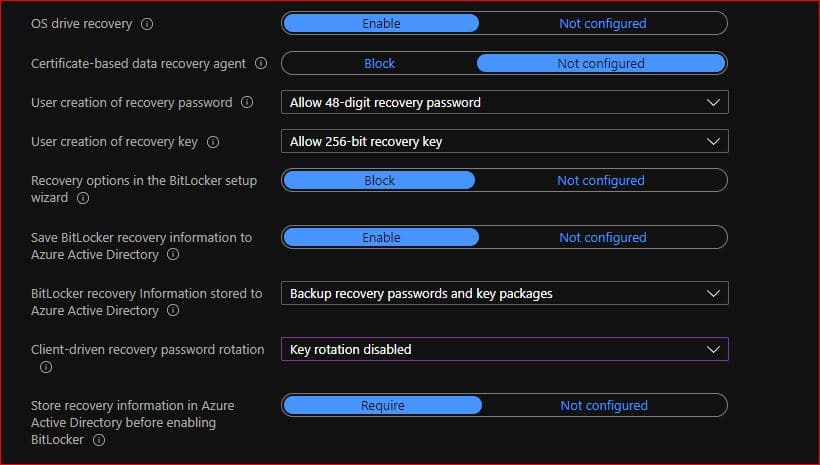
- OS drive recovery- Enable
- Recovery options in the BitLocker setup wizard- Block
- Save BitLocker recovery information to Azure Active Directory- Enable
- Client-driven recovery password rotation- Key Rotation Disabled
Here are the reasons for selecting these settings
1 OS drive recovery: Enable
This setting allow us to have control on how BitLocker-protected OS drives are recovered in the absence of the required startup key information.
2. Recovery options in the BitLocker setup wizard- Block
This blocks the user to save or print the recovery key which most admin don’t want.
3. Save BitLocker recovery information to Azure Active Directory: Enable
This will save the bitlocker key information In Azure AD
4. Client-driven recovery password rotation: Key Rotation Disabled
According to your preference you can select any option. Main purpose of thiss option is if we set to key rotation enabled for Azure AD joined devices.It will change the bitlocker key once its used and it will sync with Azure AD automatically.
If there is nothing you would like to add up you can click on Next. Assign the group you would like to target or either All devices. Once created, sync any device manually from Settings > Accounts > Access work or school account > Click on the account > Click on sync button. Then policy will be pushed and you will get the policy status from Intune and your silent encryption will be implemented.