
How to create an INTUNEWIN file for Intune?
With the help of this blog, you will be able to create an intunewin file and deploy win32 app from Microsoft intune. Intunewin file is a windows app installer file that contains intune mapped information which helps to install win32 windows applications file via intune.
This file can be created by using a windows app installer tool, which will enable you to deploy WIN32 apps on Microsoft intune enrolled windows devices. If you are looking for information on how to create an intunewin file for Microsoft intune, read through this blog.
What is Intune Win32 App Deployment?
Intune Win32 App Deployment is a process used to deploy win32 applications to Windows 10/11 devices enrolled in Intune.
The process involves devices that are Azure AD joined or Hybrid Azure AD joined. The app size of the Intunewin file must not be greater than 8 GB per app.
That’s a limit set by Intune.
Intunewin file is a file created by the intunewin tool, provided by Microsoft.
Before you begin, you should have a recent copy of Intune Win32 App Deployment intunewin file on your local machine. You can download the tool from this link from gitHub
Pre-requisites of Intune Win32 App deployment
Before starting with Intune Win32 app deployment, you must prepare your environment.
– Ensure that your devices are enrolled in Intune and either Azure AD joined, or Hybrid Azure AD joined.
– Windows 10 version 1607 or later Enterprise, Pro, or Education editions are required.
– Maximum app size must not be greater than 8 GB.
To deploy an app using Intune Win32 app deployment tool, you need to follow certain prerequisites as mentioned above. Also, make sure the app is certified for Windows 10/11 and has a file size under 8 GB. After that, you can start configuring intune app settings and customize it as per your requirement and needs.
If you have Intunewin file that is more than 8 GB then you need to create a support request and they will increase the upload size.
Download the application Installer
First, download the content prep tool. This is a direct application not a zip file.
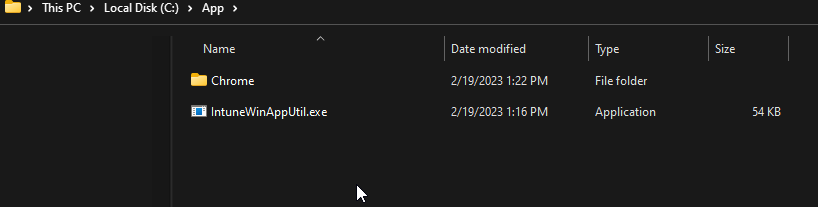
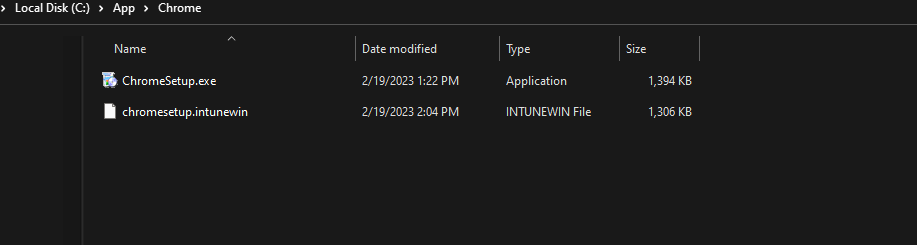
As shown below, make sure you copy all the installation files inside the source folder (example here: Chrome)
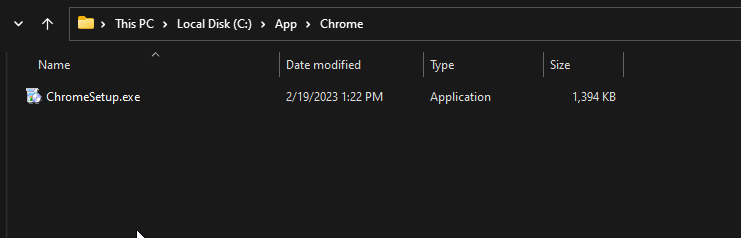
And Keep the tool(intuneWinAppUtil.exe) outside of the installation source folder.
For example:
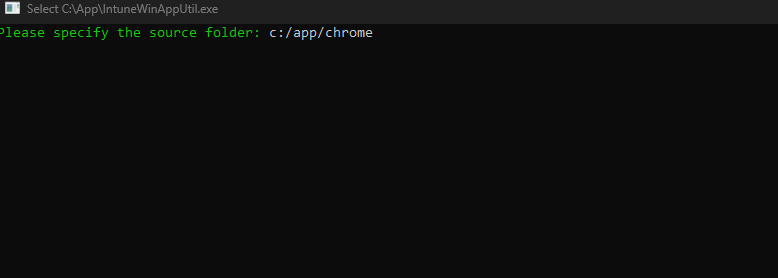
Next, Run IntunewinAppUtil.exe with admin credentials. A command prompt or CMD window will open up.
Go to the location where your application is present.
For me its c:/app/chrome
Now specify the App name. Example: Chromesetup.exe
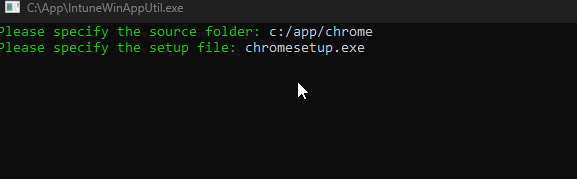
Enter the output folder path where you want the .intune file to be placed. I’ll go with the same folder. That is c:/app/chrome.
Hit Enter. Then Select N
Now the Intunewinfile format windows application is available in your specified folder.
How to Create and deploy Win32 App in Intune
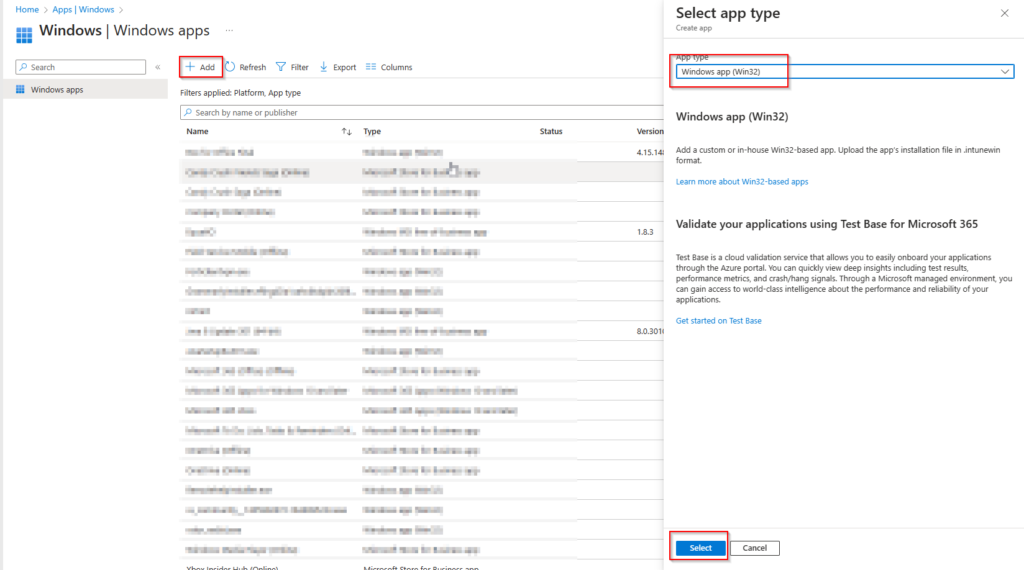
Sign in to the Microsoft Endpoint Manager admin center https://endpoint.microsoft.com/.
Select Apps > Windows > Windows Apps.
On the Select app type pane, under the Other app types, select Windows app (Win32) and click Select.
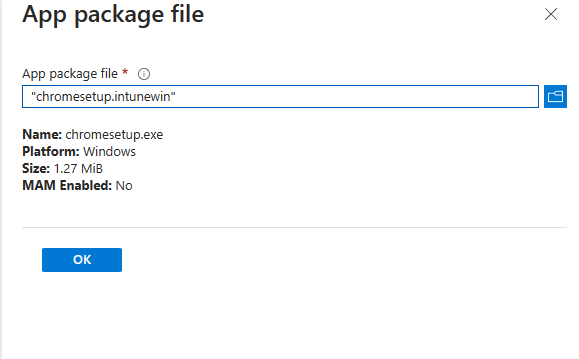
Select the app package file, which means uploading the Intune win application that we just created.
Note: Windows application size is capped at 8 GB per app. If you have Intunewin file that is more than 8 GB then you need to create a support request and they will increase the upload size.
Update the app information such as Name, Description, and Publisher. Category, Logo are Optional
On the Program page, configure the app installation and Uninstall commands for the app.
On this page, you can also make a section if you want this app to be available on the company portal app. Select yes and No respectively.
- Install command: Add the complete installation command line to install the application on the device.
Every app has different install command, so you need to check with the app developer team, what is their Silent Install command for the respective application.
- Uninstall command: Just like the install command, for uninstall command you also need to check app dev, or the app support team, if they have the information available.
This command comes in handy if you want to uninstall the application remotely. You can remove the application by adding a group under uninstall assignment and the app will be removed.
- Install behavior: Set the install behavior to System.
You can also specify the Device restart behavior and Post-installation behavior. Click Next to continue.
You can configure the application pre-requirements. On the Requirements page, specify the mandatory requirements that devices must meet before installing and click Next. If the requirements are not met the app will not install.
- Operating system architecture: Choose the architectures needed to install the windows update.
- Minimum operating system: Select the minimum operating system needed to install the windows update.
Configure the app detection rule and select “Manually configure detection rule.”
Depending on the silent install behavior given to you by the app dev. You can select any one of the below detection rule types:
- MSI
- File
- Registry
For the detection rule as well, you may need to check with the application support team. They will let you know the application detection rule, you can use MSI (If you have MSI product code), File (which folder gets credited when the app is installed), or Registery (If they provide what registry key gets changed after installation).
Hit Next.
Now it’s time to choose dependencies.
App dependencies are applications that must be installed before your Win32 app can be installed. You can require that other apps are installed as dependencies. So you can install the application on the condition that only installs if other selected applications are present on the device.
Now click next and you get a Page called Supersedence
Some of you may have questioned how can I update the win32 application from in tune. Well, Supersedence is the solution for you. This is the feature that allows you to update the win32 package remotely.
Click Next, and you get the Scope tag page. On this page, you can select your scope tags if you have any created, otherwise, click on next.
Assign the group that either contains devices or users.
Click next and Create.
Now the application is created in Intune. It will take some time to upload the application to Intune cloud. Make sure the device you are targeting is connected to the internet and syncing with intune. Your device will receive a notification that the win32 application is installed.
For assurance re-sync the device again and wait for the application to deploy.
If the application gives any return codes or failed to install, it’s either the issue with the install command or the detection rule you mentioned during the windows applications packaging creation.
Reach out to Intune support team and they will help you to find the cause of the failure.
Here is a detailed explanation of How to create an INTUNEWIN file for Intune that you can utilize to deploy the win32 application from Intune to your Windows devices.
If you would like to see other blogs, please rate this blog post and subscribe to the newsletter.