(Updated on 29 October)
Intune is a great tool for managing devices in your workplace. One of the features that Intune offers is the ability to whitelist USB devices. This can be helpful if you want to ensure that certain devices don’t access sensitive data or files. In this article, we’ll show you how to whitelist a USB device using Intune.
Prior going to this process make sure you are not blocking USB drive already from Intune. if you do, make sure to unassign them because in this procedure we will block USB access as well.
Steps to Whitelist USB devices from Intune
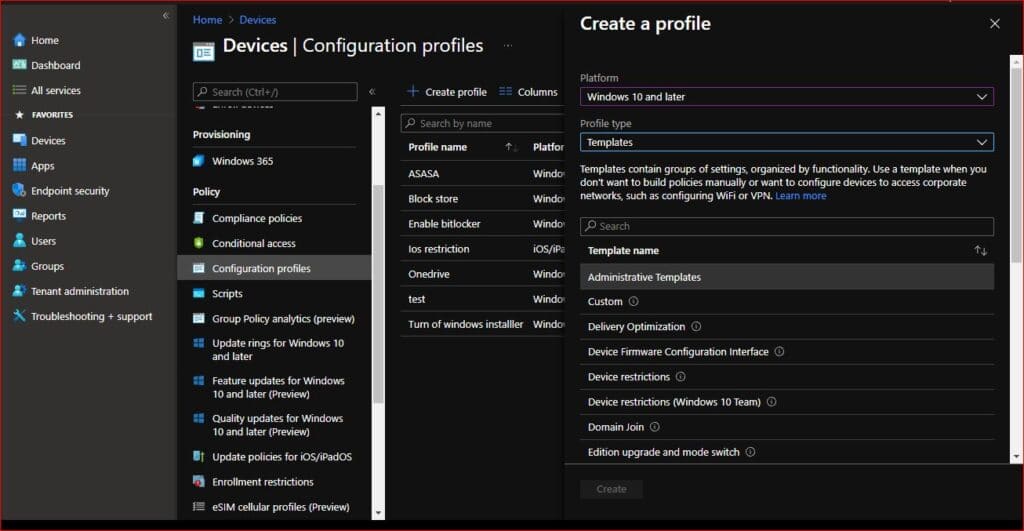
1. Go to Devices > Configuration profile > Create profile
2. Under Platform select Windows 10 and later and under Profile type select Templates
3. Now select Administrative templates. Click create
4. Name your profile and click Next
5. Click on all settings and search for “Prevent installation of devices not described by other policy settings” Select Enable radio button and hit OK.
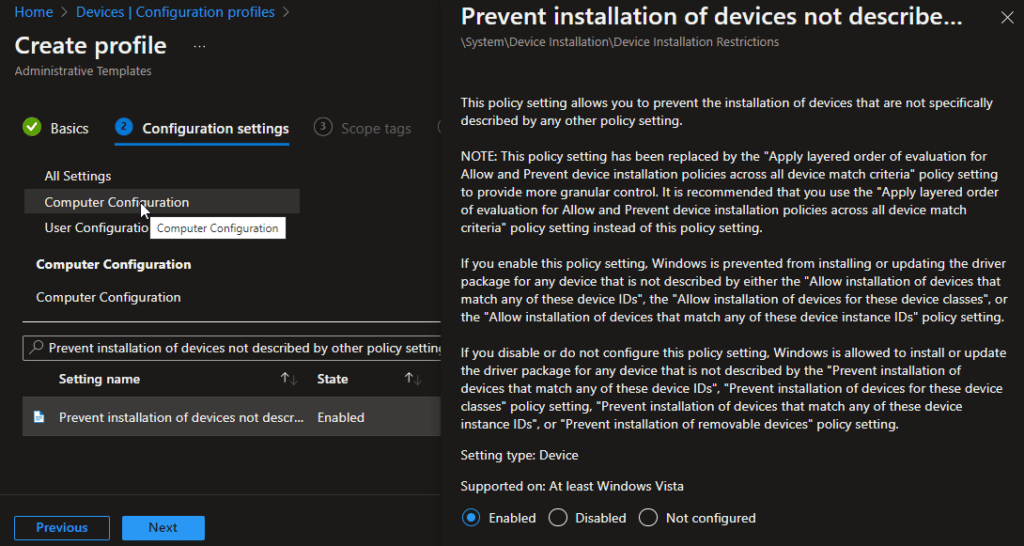
This settings will block any other devices apart from the one that you will be whitelisting with the help of other polices we are going to create
6. Now search for “Allow installation of devices using drivers that match these device setup classes” Select Enable.
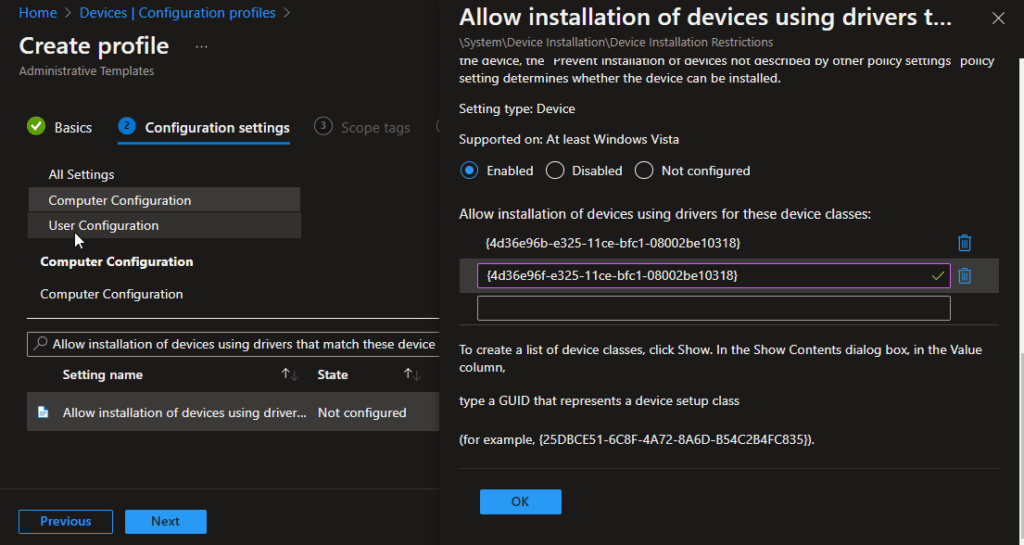
This policy setting allows you to specify a list of device setup class globally unique identifiers (GUIDs) for driver packages that Windows is allowed to install.
For Example:
Keyboard
Class = Keyboard
ClassGuid = {4d36e96b-e325-11ce-bfc1-08002be10318}
Monitor
Class = Monitor
ClassGuid = {4d36e96e-e325-11ce-bfc1-08002be10318}
Mouse
Class = Mouse
ClassGuid = {4d36e96f-e325-11ce-bfc1-08002be10318}
Network Adapter
Class = Net
ClassGuid = {4d36e972-e325-11ce-bfc1-08002be10318}
Printers
Class = Printer
ClassGuid = {4d36e979-e325-11ce-bfc1-08002be10318}
Smart Card Readers
Class = SmartCardReader
ClassGuid = {50dd5230-ba8a-11d1-bf5d-0000f805f530}
You can explore more using this link
Click Ok Once you enter your allowed USB devices.
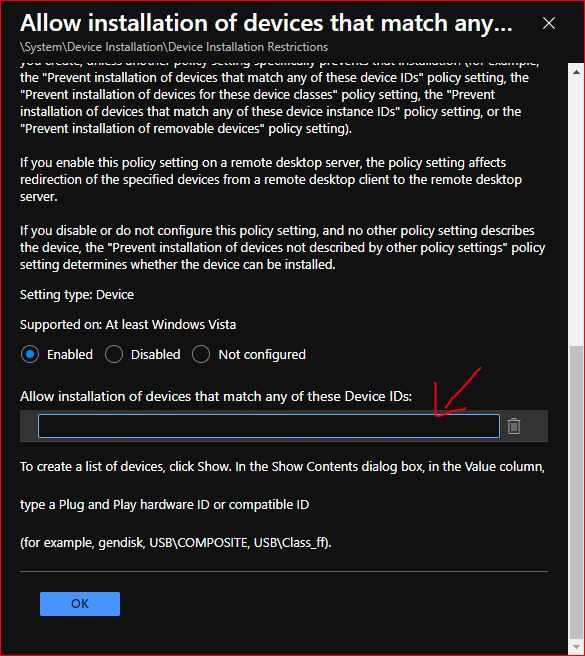
7. Now its time to add the exception. Search for “Allow installation of devices that match any of these Device IDs”
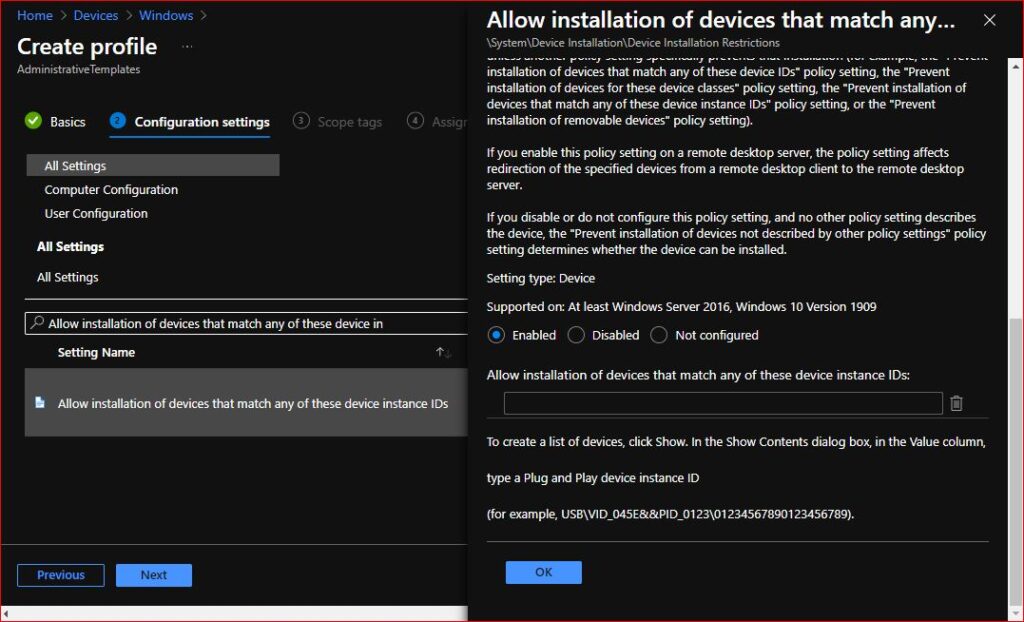
This policy setting allows you to specify a list of Plug and Play hardware IDs and compatible IDs for devices that Windows is allowed to install.
Now its time to gather the details from the USB device.
How to gather Device ID for USB devices
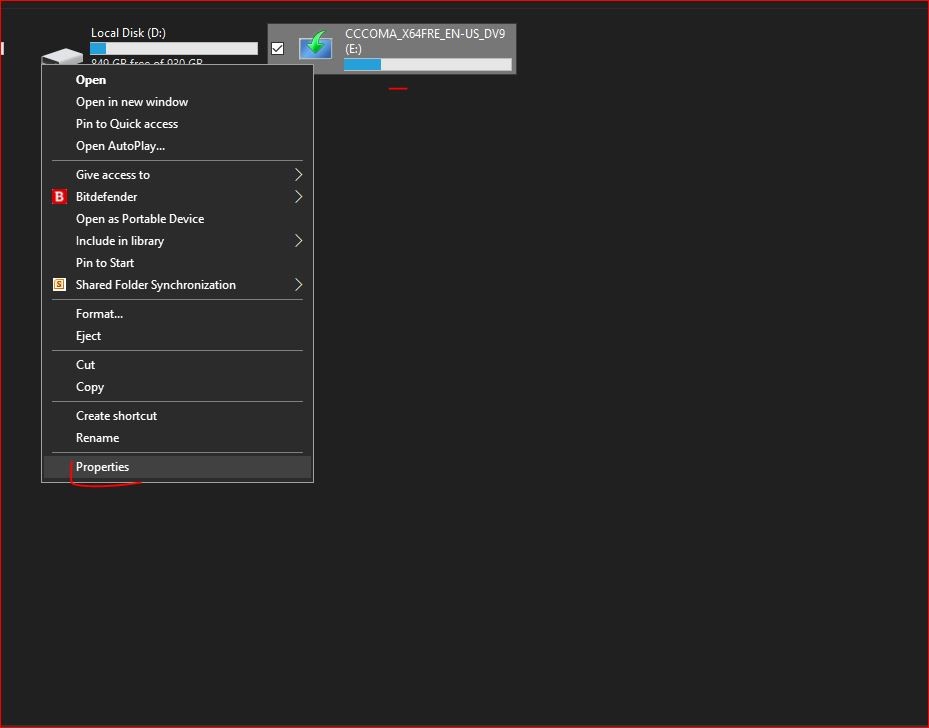
1. Plug in the USB device
2. Right click on USB device and click on Properties
3. Click on Hardware and Double click on your USB device
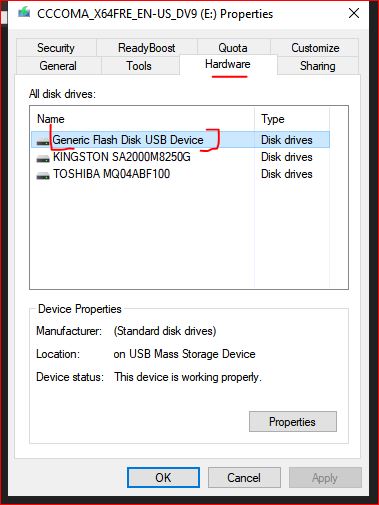
4. Click on Details and click on drop down menu

5. If you are looking for Instance ID, Click on Device Instance path.
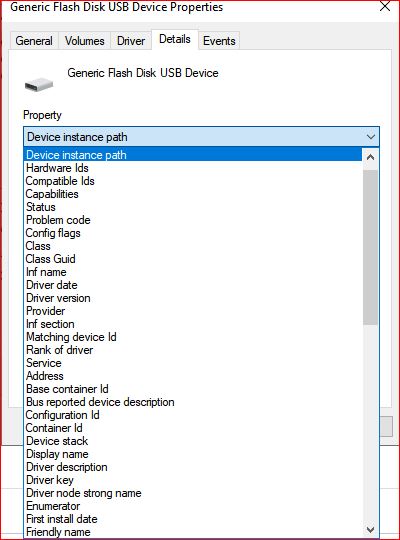
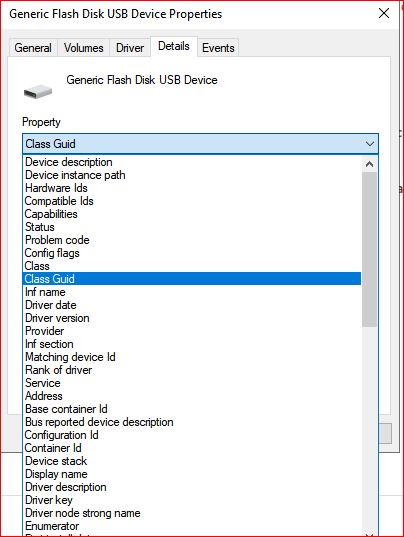
If you are looking for setup class, click on Class GUID. For Device ID, you can click on Hardware IDs
6. Once you clicked, copy the outcome and paste it into the section of policy in Intune.
Once you paste the outcome now lets continue the procedure to Allow only authorized USB devices
8. Click OK and click on Next
9, If you do, select scope tag. Otherwise click on Next.
10. Assign the group you want. Once assigned click Select
11. Click next and click create
12 Once created,
Sync the device manually. Either from Intune or from device
For syncing from device Go to Settings > Accounts > Access work or school account > Click on you Azure AD account > Hit Sync
Check if policy is showing succeeded on the device or not. If succeeded, try to input any other USB and it will be blocked. Make sure not to Input the USB we gathered Instance/GUID from because we whitelisted it.